The glowing realism of the Old Masters isn’t magic, but a disciplined, problem-solving system any modern artist can adopt.
- Solve value and form first with a grisaille underpainting before ever touching color.
- Achieve structural integrity with the “fat over lean” rule to prevent cracking and ensure longevity.
Recommendation: Embrace the workflow not as a set of restrictive rules, but as a method to isolate and conquer artistic challenges sequentially for predictable, luminous results.
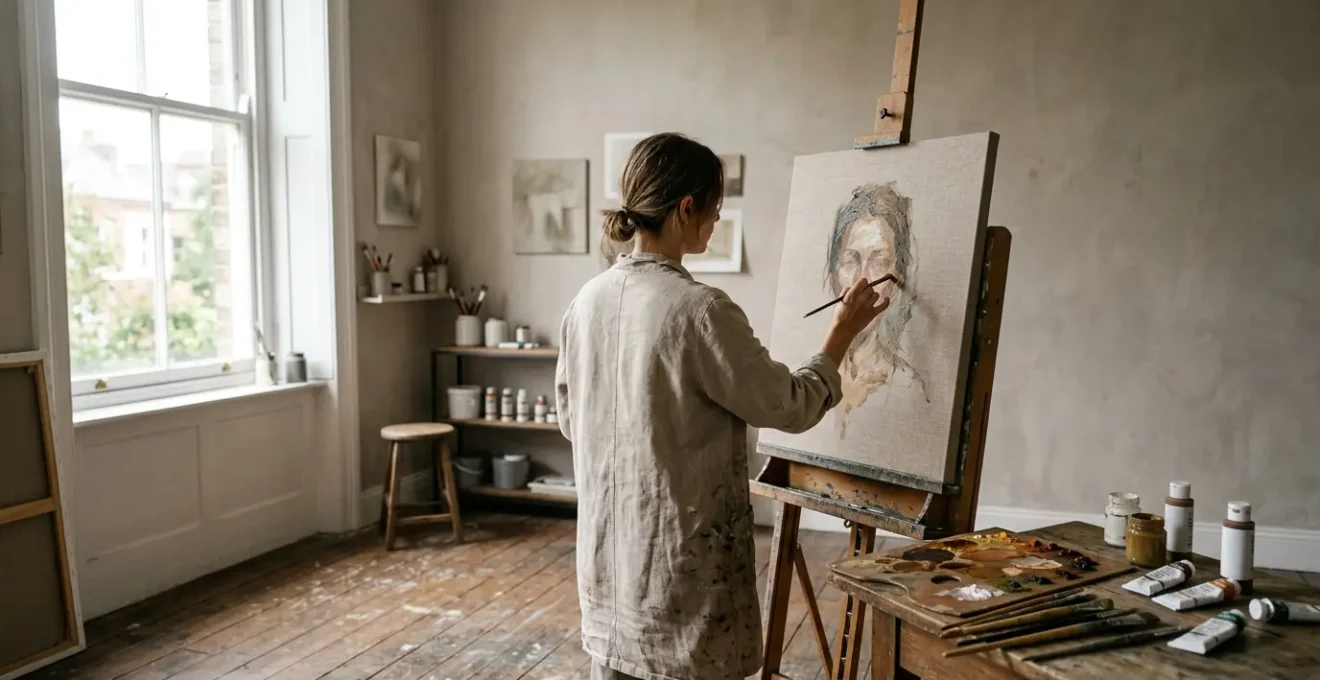
Every realist painter has faced it: the frustration of a portrait that looks flat, of skin tones that turn to mud, of a composition that lacks the breathtaking depth of a Rembrandt or Vermeer. We invest in expensive paints and fine brushes, hoping the tools themselves hold the secret. Yet, the luminosity we chase remains elusive, a ghost in the canvas that seems to mock our efforts. We are told to “practice more” or “study the masters,” but this advice often leads to aimless copying without true understanding.
But what if the secret wasn’t in a specific brand of paint or a magical brush technique? What if the Old Masters weren’t simply better painters, but more disciplined thinkers? The key to their luminous effects lies not in a chaotic flurry of genius, but in a rigorous, sequential problem-solving system. They understood that to create a complex and harmonious whole, you must first isolate and master each constituent variable—value, form, color, and structure—one at a time.
This is the fundamental shift in mindset that this guide will impart. We will not be merely listing techniques. Instead, we will deconstruct the Old Master workflow as a logical methodology. By embracing this disciplinary mindset, you will learn to build a painting from the ground up with the structural integrity and controlled luminosity that has defined masterworks for centuries.
This comprehensive guide breaks down the essential pillars of the classical workflow. Below, you will find a detailed exploration of each stage, designed to build your skills methodically and transform your approach to realist painting.
Summary: How to Adopt the “Old Master” Workflow for Modern Realism?
- Why Starting With a Grisaille Saves You 50% of Painting Time?
- Limited Palette Mastery: Can You Paint Skin Tones With Just 4 Colors?
- How to Set Up Your Studio Light to Create Dramatic Chiaroscuro?
- The Layering Error That Causes Cracks in 90% of Student Oils
- How to Find a Mentor Who Teaches Traditional Atelier Methods Today?
- Why Do Academies Force Students to Copy Old Masters for Years?
- How to Spot the Use of Linear Perspective in Early Renaissance Works?
- How to Achieve Luminous Depth Using the Oil Glazing Technique?
Why Starting With a Grisaille Saves You 50% of Painting Time?
The modern impulse is to dive directly into color, chasing the final look from the first stroke. This is a recipe for frustration. The Old Masters understood a profound truth: a painting that works in color must first work in value. The grisaille, a monochromatic underpainting typically done in shades of grey, is not an extra step; it is the most efficient problem-solving tool in a painter’s arsenal. By working only with black, white, and greys, you are forced to resolve all questions of light, shadow, and form before the complexities of hue and saturation are ever introduced.
This disciplined approach of isolating variables is the cornerstone of the atelier method. You are no longer trying to juggle form, temperature, and value simultaneously. You are simply sculpting with light. Once your grisaille is complete and has established a powerful and accurate value structure, applying color becomes a far more intuitive and successful process. You will find that you spend less time correcting muddy colors and more time building luminous, transparent layers, because the foundational work is already done. This isn’t about restriction; it’s about liberation from chaos.
- Tone your canvas with a mid-tone neutral color to eliminate the intimidating white surface.
- Draw your subject outline with charcoal or thin paint on the toned ground.
- Block in your composition using only 5 distinct values: pure black, dark grey, mid-grey, light grey, and pure white.
- Start with medium shades of grey to create shadows, building detail gradually.
- Add your lightest tints and darkest accents last, focusing on establishing strong value relationships without worrying about color.
- Allow the grisaille to dry completely before applying transparent color layers over it.
Limited Palette Mastery: Can You Paint Skin Tones With Just 4 Colors?
Once value is resolved, the next variable to control is color harmony. The idea of painting convincing skin tones with a mere four tubes of paint may seem impossible in an age of infinite pigment choice, but this is precisely the power of a limited palette. The famed “Zorn palette”—named after Swedish master Anders Zorn and typically consisting of Yellow Ochre, Cadmium Red, Ivory Black, and Titanium White—is a testament to the principle of mastery through limitation. Ivory Black acts as a cooling agent and a substitute for blue, creating an incredibly harmonious and unified range of tones that are perfect for capturing the subtleties of flesh.
Using a limited palette forces you to become a master of color mixing, not a collector of tubes. You learn that the relationship between colors is more important than the exact hue of any single color. This approach guarantees that no matter how you mix, your colors will remain in harmony, preventing the chalky, discordant results that often plague beginners. It is a direct continuation of the “isolating variables” philosophy: by constraining your choices, you amplify your control and achieve a sophisticated, unified result.
The choice of palette has a profound impact on the final mood and color harmony of a portrait. While the Zorn palette is a cornerstone of traditional realism, modern pigments offer an alternative with a different character, as this comparative analysis demonstrates.
| Palette Type | Core Colors | Advantages | Limitations | Best Use Case |
|---|---|---|---|---|
| Traditional Zorn | Yellow Ochre, Vermilion/Cadmium Red, Ivory Black, Titanium White | Harmonious, unified tones; excellent for subtle skin tone shifts; historically proven | No true blue; muted greens and purples; limited saturation | Indoor portraits, figurative work, warm lighting scenarios |
| Modern Primary Limited | Quinacridone Magenta, Phthalo Blue, Hansa Yellow, Titanium White | Wider, cleaner color gamut; brighter mixtures; maintains color harmony | May require more sensitive handling for realistic skin; brighter than traditional | Contemporary realism, varied lighting conditions, expanded subject matter |
How to Set Up Your Studio Light to Create Dramatic Chiaroscuro?
Chiaroscuro, the dramatic interplay of light and shadow, is not merely a stylistic choice; it is the engine of three-dimensional form in classical painting. Before you can paint it, you must see it. The Old Masters were masters of observation, and they understood that the most powerful sense of form comes from a single, strong, directional light source. This is the opposite of the flat, non-committal lighting that fills most modern rooms. To create drama, you must control the light.
Setting up your studio to achieve this is surprisingly simple. Position a single lamp at a 45-degree angle to your subject, either from the side or slightly above. This creates clear, defined areas of light, shadow, and halftone. You will see the form turn, you will see cast shadows that anchor the subject in space, and you will see the subtle reflected light that gives life to the shadows. This is the “Rembrandt lighting” so often discussed—it is not a complex formula, but a simple, powerful observation of how light reveals form. The illustration below demonstrates this exact principle in action.
By establishing this strong light and shadow pattern in your setup, you provide a clear roadmap for your grisaille underpainting. You are not inventing form; you are translating a tangible reality. This controlled lighting environment allows you to focus on the structure of light, making the subsequent painting process an exercise in observation rather than guesswork. You are, in effect, sculpting with light before ever picking up a brush.
The Layering Error That Causes Cracks in 90% of Student Oils
A painting is not just an image; it is a physical object built from layers of material. The long-term survival of that object depends on its structural integrity. The single most important rule governing this integrity is “fat over lean.” This principle dictates that each successive layer of oil paint should be more flexible (fatter, or more oil-rich) than the one beneath it. Violating this rule is the primary cause of the cracking and flaking that plagues so many paintings, as conservation studies on oil paint film instability confirm.
Why does this happen? Leaner layers, thinned with solvent, dry faster and become rigid. Fatter layers, rich in oil, dry slower and remain flexible for longer. If you paint a lean, fast-drying layer on top of a fat, slow-drying layer, the bottom layer will continue to shift and move as it cures, while the brittle top layer cannot accommodate this movement. The result is inevitable: the top layer cracks. Adhering to the “fat over lean” rule ensures your painting is built on a stable foundation, with each layer able to move in concert with the whole. It is the architectural engineering of painting, ensuring your work can survive for generations.
To apply this principle correctly, one must systematically increase the oil-to-solvent ratio in their painting medium for each subsequent layer. The following table provides a clear, reliable guide for this process.
| Layer Stage | Medium Ratio (Solvent:Oil) | Characteristics | Drying Time | Example Application |
|---|---|---|---|---|
| Layer 1 (Imprimatura/Block-in) | 75% Gamsol : 25% Linseed Oil | Lean, thin wash; fast drying; less flexible | 1-3 days | Initial toned ground or compositional sketch |
| Layer 2 (Underpainting) | 50% Gamsol : 50% Linseed Oil or Galkyd | Moderate; balanced flow; establishing forms | 3-5 days | Grisaille or dead coloring layer |
| Layer 3 (Opaque modeling) | 25% Gamsol : 75% Linseed Oil or medium | Fat; increased flexibility; richer color | 5-7 days | Building solid light/dark masses and detail |
| Final Layers (Glazes/Details) | 0% Solvent : 100% Oil or Galkyd Medium | Fattest; maximum flexibility; slow cure; most durable | 7-14+ days | Transparent glazes, final highlights, finishing touches |
How to Find a Mentor Who Teaches Traditional Atelier Methods Today?
The Old Master workflow is a system, and like any complex system, it is learned most effectively under the guidance of a mentor who has already walked the path. In the 21st century, the search for this traditional knowledge has moved online, but the principles of true apprenticeship remain the same. A legitimate atelier education, whether in-person or digital, is not a quick fix or a collection of “hacks.” It is a slow, methodical, and patient process of skill-building, rooted in centuries of tradition.
True ateliers prioritize foundational drawing skills above all else. They understand that you cannot paint what you cannot draw. This disciplined, sequential approach is the hallmark of authentic training. A powerful modern example of this is the Florence Academy of Art, founded by Daniel Graves. The academy rigorously preserves the Old Master methods, requiring students to master sight-size drawing and grisaille underpainting before progressing to color, ensuring a deep understanding of form and value. This commitment to process over product is a key indicator of a mentor’s quality. They are not selling a shortcut; they are preserving a lineage.
When seeking a mentor, you must become a discerning student. Look for evidence of a systematic curriculum, a clear lineage of training, and a focus on incremental skill-building over promises of rapid mastery. Your goal is to find a teacher, not an entertainer.
Your Vetting Checklist: Finding an Authentic Atelier Mentor
- Foundational Drawing Emphasis: Does the curriculum require mastery of sight-size drawing and cast drawing before painting? Verify this critical first step.
- Systematic Process: Check for a multi-stage painting process in the curriculum (imprimatura, grisaille, glazing). Is it a structured system or just a collection of tips?
- Realistic Timeframe: Be wary of promises for “mastery in weeks.” Legitimate classical training is a years-long commitment to patient skill-building.
- Instructor Lineage: Investigate the instructor’s background. Can they trace their training back to a recognized, reputable atelier?
- Quality of Critique: Do they offer individualized, personal feedback and corrections, or just pre-recorded, generic video lessons? True mentorship requires direct guidance.
Why Do Academies Force Students to Copy Old Masters for Years?
The practice of copying Old Master paintings is one of the most misunderstood aspects of classical training. To the modern eye, it can seem like a stifling exercise in imitation, counterintuitive to the goal of developing a unique artistic voice. However, this view fundamentally misinterprets the purpose of the master copy. It is not an act of forgery; it is an act of deconstruction and reverse-engineering. When a student copies a Velázquez or a Sargent, they are not merely replicating an image. They are retracing the master’s thoughts.
Each brushstroke becomes a question: Why this color? Why this edge quality? How was this transition from light to shadow achieved? The student is forced to slow down and analyze the master’s solutions to the universal problems of painting. It is an intimate dialogue across centuries. As noted in a tutorial by Creative Bloq, the goal is to absorb the “aesthetic sensibilities of the artist,” which is fundamental to developing one’s own taste and connoisseurship. It is through this deep, analytical study that a student internalizes the principles of composition, color harmony, and brushwork, building a visual library of successful solutions they can later apply to their own original work.
This process is about learning a language. Before you can write your own poetry, you must first learn the grammar, syntax, and vocabulary established by the great poets who came before you. The master copy is the most effective way to become fluent in the language of paint. It builds the foundation upon which a unique, personal voice can be built, rather than leaving the artist to reinvent the wheel in isolation.
How to Spot the Use of Linear Perspective in Early Renaissance Works?
The invention of linear perspective during the Renaissance was more than a technical trick; it was a revolution in thought that allowed artists to create a convincing, rational illusion of three-dimensional space on a two-dimensional surface. This underlying geometric structure, or “architectural blueprint,” is the foundation upon which the entire scene is built. For the modern painter, learning to see this hidden grid is the first step toward creating compositions with true spatial integrity.
At its core, linear perspective is a system where all parallel lines receding into the distance (orthogonals) appear to converge at a single point on the horizon line, known as the vanishing point. In Renaissance masterpieces, this is not an accident; it is a deliberate, mathematical construction. The floor tiles in Masaccio’s “Holy Trinity” or the architecture in Raphael’s “School of Athens” are not merely decorative—they are the visible lines of the perspective grid that organizes the entire pictorial space and directs the viewer’s eye. Today, we can use simple digital tools to reveal this hidden structure in high-resolution images, making the masters’ intellectual process visible.
By tracing the orthogonal lines of architectural elements, you can reverse-engineer the artist’s composition and find the precise vanishing point they used to build their world. This exercise transforms your viewing of art from passive appreciation to active analysis.
- Open a high-resolution image of a Renaissance painting (e.g., by Masaccio or Raphael) in an image editor.
- Create a new layer to draw your analysis lines without altering the original image.
- Identify architectural elements with clear receding lines, such as floor tiles, ceiling beams, or buildings.
- Using a line tool, trace these orthogonal lines as they recede into the painting’s space.
- Observe where these lines converge: this is the vanishing point, which reveals the artist’s intended eye level for the viewer.
- Draw a horizontal line through the vanishing point to identify the horizon, exposing the painting’s foundational grid.
- Apply this principle to your own work by identifying these structural lines in your reference photos before you begin to paint.
Key takeaways
- Grisaille isn’t an extra step; it’s a shortcut that solves 90% of your value problems upfront.
- The “fat over lean” principle is non-negotiable for the physical longevity and structural integrity of your work.
- Luminosity is not an accident; it is built through the disciplined application of transparent glazes over a solid, well-structured underpainting.
How to Achieve Luminous Depth Using the Oil Glazing Technique?
Glazing is the final, crowning stage of the Old Master workflow, where the magic of “controlled luminosity” is truly realized. It is the reward for the disciplined, structural work you have laid down in the preceding layers. A glaze is a thin, transparent layer of paint, typically mixed with a medium, applied over a dried, opaque underpainting. Its effect is fundamentally different from opaque paint mixing. As explained by experts, glazing creates luminosity by allowing light to pass through a transparent pigment layer, strike the opaque layer beneath, and reflect back to the viewer’s eye. This creates a depth and richness of color that is physically impossible to achieve by simply mixing pigments on a palette.
Think of it as light being trapped and colored within the painting itself, rather than just bouncing off the surface. This is what gives a Vermeer its inner glow or a Titian its vibrant, jewel-like tones. The grisaille underpainting provides the light and shadow—the form—while the subsequent glazes provide the color without disturbing that form. You can apply a transparent red over a grey underpainting to create a deep, rich crimson, or a blue glaze over a light area to create a cool, atmospheric distance. The illustration below perfectly captures the application of this delicate, transformative layer.
Each glaze must be allowed to dry completely before the next is applied, and the “fat over lean” rule remains paramount. This is a slow, patient process. It is the opposite of the instant gratification sought by alla prima painting. However, the result is an unparalleled level of control over color and a luminous depth that makes the painted subject feel truly alive. It is the culmination of a system where every layer builds upon the last, leading to a whole that is far greater than the sum of its parts.
The path of the Old Masters is not a relic of the past; it is a living, breathing methodology for any artist seeking depth, structure, and luminosity. By embracing this disciplined workflow, you are not shackling your creativity—you are liberating it. You are giving yourself a system to solve the fundamental problems of painting, so that your energy can be focused on what truly matters: your vision. Begin your journey today by preparing your first toned canvas; the masters are waiting.