Success with non-archival materials isn’t about finding the strongest glue; it’s about making a deliberate choice between permanent preservation and controlled decay.
- Embrace “material lifespan” as an artistic tool, not a technical failure.
- Master professional conservation techniques (adhesives, consolidants) for gallery-level stability.
Recommendation: Shift your mindset from fighting your materials to collaborating with their inherent properties and lifecycles.
You’ve dragged home a haul of urban debris: warped plastic, rusted metal, faded flyers. The impulse to incorporate these textures and histories into your work is powerful. But then, the doubt creeps in. How do you make these materials stick? Will your piece crumble into dust in a decade? Will any serious gallery even look at it? For too long, the conversation around mixed media has been dominated by generic craft advice and dire warnings about permanence, leaving audacious artists in a frustrating limbo.
The common wisdom tells you to use archival-safe materials, period. It suggests that using anything ephemeral, from found objects to commercial packaging, is a professional dead end. This binary view ignores a crucial truth: the most exciting contemporary art often lives in the tension between the permanent and the perishable. It’s not about avoiding unconventional materials; it’s about understanding and mastering them. Your role is not just to be a maker, but a material alchemist, fully in control of your medium’s destiny.
This is where we break from the pack. This guide is not about telling you *what* to use, but *how* to think. It’s about shifting your perspective from one of fear—fear of decay, fear of rejection—to one of intentionality. We will explore the professional-grade techniques for stabilizing volatile materials when you need permanence, and the conceptual frameworks for embracing their decay when you choose ephemerality. You will learn the language of conservators and the safety protocols of a professional studio, transforming your practice from haphazard experimentation into a series of deliberate, powerful artistic statements.
This article provides a structured path to mastering the chaos. We will move from foundational technical challenges to the philosophical and professional considerations of working with unconventional media. Each section builds on the last, equipping you with the knowledge to make bold, informed decisions about every material you bring into your studio.
Summary: Mastering Unconventional Materials in Your Artwork
- How to Glue Plastic to Canvas Without It Falling Off in a Year?
- Why Are Artists Embracing Materials That Decompose Over Time?
- Print and Paint: How to Layer Acrylic Over Digital Prints?
- The Safety Hazard of Heating Plastic or Styrofoam for Art
- How to Clean and Prep Urban Debris for Gallery Display?
- How Do Museums Stop Ancient Organic Materials From Disintegrating?
- Toxic Cadmium vs. Plant Dyes: How to Make Your Studio Zero-Waste?
- How to Manipulate Acrylics to Mimic Oil or Watercolor?
How to Glue Plastic to Canvas Without It Falling Off in a Year?
The first point of failure for any ambitious mixed-media artist is often the most basic: adhesion. You’ve found the perfect piece of translucent plastic, but how do you reconcile its synthetic, non-porous surface with the woven fibers of a canvas? Consumer-grade glues like hot glue or basic craft adhesives create a brittle, superficial bond that will inevitably fail as temperature, humidity, and time exert their forces. This is the first moment of Archival Tension, where your creative vision collides with material reality.
To move beyond the amateur level, you must think like a conservator. The goal is not just to stick two things together, but to create a bond that is strong, flexible, and, crucially, reversible without damaging the artwork. Professionals in art conservation turn to specialized adhesives formulated for this exact purpose. For instance, BEVA 371 is a heat-activated adhesive that has become a global standard. As the Conservator’s Products Company notes, BEVA 371 is the only adhesive specifically formulated to meet the demanding requirements of art conservation. Its unique properties allow it to bond dissimilar materials—like plastic to canvas—with a resilience that commodity products can’t match.
Using such a product requires a more deliberate process than simply squeezing a tube. It involves applying the adhesive film to one surface, allowing the solvent to evaporate, then positioning the object and applying controlled heat and pressure to activate the bond. This is Surface Reconciliation in practice. It’s a methodical approach that respects the chemical nature of your materials, ensuring the physical integrity of your work and signaling a level of professionalism that goes far beyond the glue gun.
By adopting these conservation-level tools and techniques, you are not just preventing your art from falling apart; you are making a foundational choice for its long-term existence.
Why Are Artists Embracing Materials That Decompose Over Time?
While one part of the professional artist’s brain obsesses over permanence, another, more radical contingent is moving in the opposite direction. They are actively choosing materials—food, flowers, unfixed paper, raw organic matter—precisely because they will change, decay, and disappear. This is not a technical failure; it is a profound conceptual choice. It’s the practice of Controlled Degradation, where the artist accepts that the work’s evolution and eventual demise are integral to its meaning.
This embrace of the ephemeral challenges the traditional market’s obsession with art as a permanent, static commodity. Instead, it positions the artwork as an event, a process, or a performance that unfolds over time. The beauty lies in the transformation—the wilting of a petal, the rusting of untreated steel, the fading of a photograph left in the sun. As an analysis of the movement notes, this approach is central to modern and contemporary practice. It represents a fundamental shift in the artist’s role.
Ephemeral art is inherently modern and contemporary. It is fundamental to many artistic movements and forms, representing a shift where the artist is merely an artificer who sets the conditions for the work to follow its own destiny.
– Art Historical Analysis, Wikipedia: Ephemeral Art
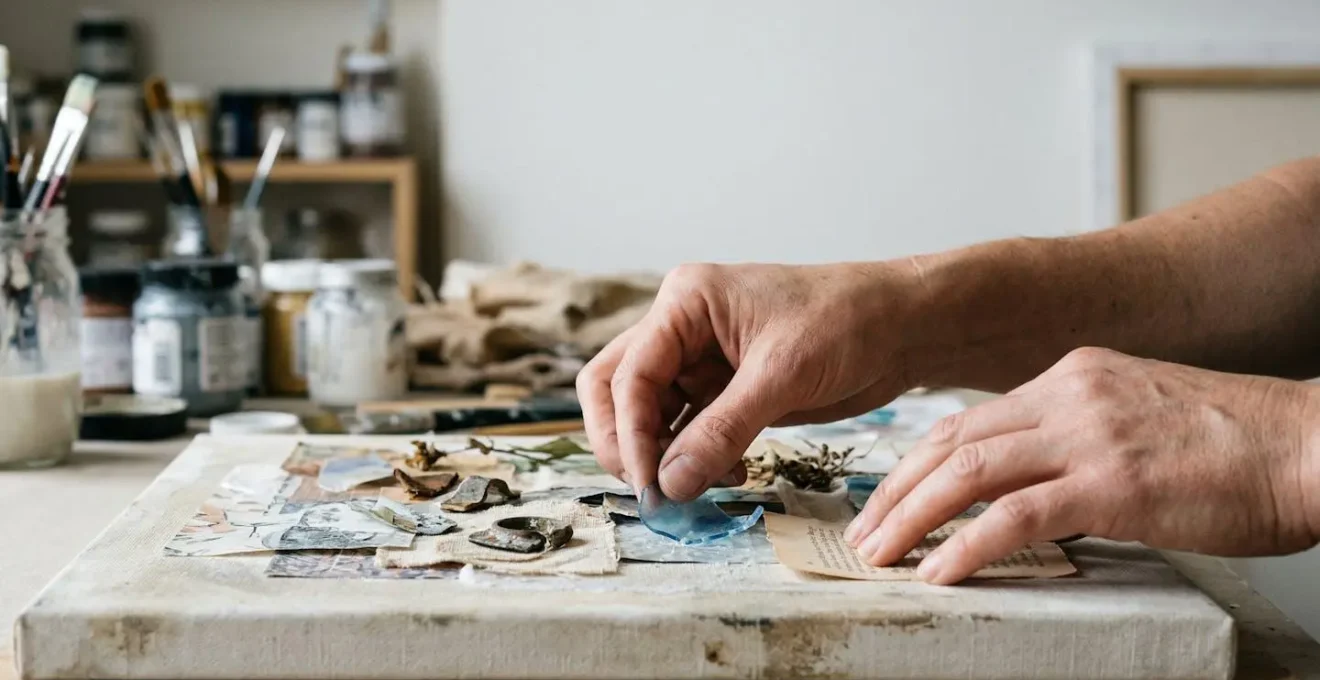
This image perfectly captures the aesthetic of decay, where the focus shifts to the micro-textures of transformation and the beauty inherent in the process.
As you can see, the focus is not on a finished object but on the visual story of change. Choosing this path requires a different kind of mastery. It’s not about fighting the material’s nature, but about understanding its Material Lifespan and choreographing its decay. You must consider how the work will be documented, how its transformation will be presented, and what its final state—even if that state is nothingness—communicates to the viewer. This is a bold move that redefines value away from permanence and toward experience.
By incorporating materials that decompose, you are not creating a flawed object; you are creating a living, changing narrative that questions the very nature of art itself.
Print and Paint: How to Layer Acrylic Over Digital Prints?
The hybrid space where digital and analog media collide is a fertile ground for innovation. Layering expressive, tactile acrylic paint over a crisp, flat digital print creates a dynamic tension between the machine-made and the hand-wrought. However, this act of Surface Reconciliation is fraught with technical pitfalls. Paint can bead up on glossy photo paper, colors can look dead over the wrong substrate, and the final piece can lack cohesion. Success depends on a structured approach to layering.
The key is to treat the digital print not as a finished surface, but as the first layer of a new painting. To create a unified and structurally sound piece, you must prepare the surface and build your layers strategically. Forget the idea of just painting directly on top; you need to create a bridge between the ink of the print and the polymer of the acrylics. This often starts with applying a clear or tinted ground (like a matte medium or a transparent gesso) to give the surface “tooth” for the paint to grip onto.
From there, a disciplined layering process ensures visual depth and physical stability. Building from thin washes to thicker applications prevents the cracking that can occur when a fast-drying thin layer is applied over a slow-drying thick one. Each layer must be a deliberate choice, contributing to the final texture and transparency. The most successful works are those where the digital and painted elements feel truly integrated, not just stacked. Here are the key steps to achieve that fusion:
- Start with a ground: Apply a warm or neutral ground over your print to unify the piece and enhance contrast and value from the very first stroke.
- Build from thin to thick: Begin with watery washes and build up to thicker, more textured strokes. This maintains the structural integrity of the paint film and prevents cracking.
- Respect drying times: Ensure each layer is completely dry before adding the next. Painting over a semi-wet layer can cause colors to lift or create muddy, unintentional blends.
- Use mediums to control texture: Incorporate matte or gloss mediums into your paints to adjust transparency, sheen, and texture, creating a varied and visually interesting surface.
- Save details for last: Keep your crisp lines, sharp details, and brightest highlights for the final top layers to ensure they have maximum visual impact and are not obscured.
By following this workflow, you transform a simple layering process into a sophisticated dialogue between two distinct visual languages, resulting in a single, powerful artwork.
The Safety Hazard of Heating Plastic or Styrofoam for Art
In the quest for new forms and textures, the heat gun can seem like a magic wand, capable of melting, warping, and transforming mundane plastics into organic, sculptural shapes. But this act of material alchemy comes with a serious, often invisible, cost. The process of heating or burning many plastics, especially Styrofoam (polystyrene) and PVC, releases a cocktail of toxic gases. This isn’t just an unpleasant smell; it’s a significant health hazard that demands a professional approach to Studio Toxicology.
Ignoring these dangers is a rookie mistake. According to institutional safety guidelines from bodies that oversee art departments, heating or burning plastic produces toxic gases including styrene, a neurotoxin and potential carcinogen, and chlorine gas, a severe respiratory irritant. Chronic exposure to these fumes can lead to long-term health problems. Your studio should be a place of creation, not a toxic environment that compromises your well-being. A truly audacious artist is not one who recklessly endangers themselves, but one who masters their materials and their environment with intelligence and respect.
This means investing in and correctly using proper safety infrastructure. It is non-negotiable. A simple open window is not enough.
As this setup demonstrates, a professional workspace for these techniques requires, at a minimum, a dedicated fume extraction system that vents directly outdoors. This is not just a fan; it’s a localized ventilation hood that captures fumes at the source before they can enter your breathing space. Furthermore, a respirator with organic vapor cartridges is essential. These are not the simple dust masks used for sanding; they are specifically designed to filter out the harmful gaseous compounds released from heated plastics. Protecting your health is the prerequisite for a long and productive artistic career.
Treating studio safety with this level of seriousness is not a limitation on your creativity; it’s the very thing that enables you to continue pushing boundaries for years to come.
How to Clean and Prep Urban Debris for Gallery Display?
You’ve rescued a piece of weathered wood or a beautifully corroded metal sheet from a construction site. Its raw, authentic texture is the soul of your piece. But how do you take it from street-found “trash” to a gallery-ready object without destroying its character? The challenge is to stabilize the material—stop the flaking, prevent further crumbling, and clean off biological contaminants—while preserving the aesthetic of decay that attracted you in the first place. This is where artists can borrow directly from the field of museum conservation.
The first step is cleaning, which must be done with care. Aggressive scrubbing can strip away a delicate patina. Often, a simple dry brushing to remove loose dirt, followed by a gentle wipe-down with a specific solvent like ethanol or deionized water (depending on the material), is sufficient. The goal is to remove grime and potential biohazards without altering the desired surface. For porous materials like crumbling paper or rotted wood, stabilization is the priority. Here, conservators use a class of materials called consolidants.
Museum-Level Conservation Techniques for Found Objects
Conservation professionals use consolidants to stabilize fragile found objects before they can be displayed. These are typically polymer resins diluted in a solvent, which are applied to the object. The solvent evaporates, leaving the resin behind to strengthen the material’s internal structure from within. As explained in a review of conservation methods by the American Chemical Society, consolidants treat the edges of broken or deteriorating materials, hardening them so they can be joined or preserved without crumbling. This technique is essential for preventing paint from flaking off surfaces and for strengthening porous materials, allowing for the preservation of an object’s authentic appearance while ensuring the structural stability required for a gallery presentation.
This process allows you to freeze the object in its perfect state of decay. You are not “repairing” it in the traditional sense; you are reinforcing it. You are making a deliberate choice about its Material Lifespan, arresting its degradation at a specific moment. This elevates the found object from a piece of debris into a stabilized, intentional component of your artwork, ready for the scrutiny of the art world.
By learning this vocabulary and these methods, you bridge the gap between the chaotic discovery of the object and the controlled environment of the gallery.
How Do Museums Stop Ancient Organic Materials From Disintegrating?
When we think of museums, we think of permanence. We see ancient textiles, fragile manuscripts, and ethnographic artifacts, and we assume they are “archival.” But what does that word even mean? For the artist working with non-traditional materials, understanding how institutions approach longevity is revelatory. It demystifies the process and provides a more useful, functional vocabulary. The surprising truth is that the term “archival” itself is considered obsolete by the very professionals who are in charge of long-term preservation.
The term ‘Archival’ is being phased out of the International vocabulary due to the fact that no quantifiable standards for this term were ever established.
– G-Collective, What is ‘Archival’ Anyways? Defining a Misunderstood Term
This is a game-changing piece of information. It frees you from the vague, intimidating pressure of an undefined standard. Instead, the international conservation community now uses a much more precise, tiered system based on quantifiable timeframes. According to international storage practices standards like ISO18920, preservation is classified by its expected duration: ‘Medium-Term’ (up to 10 years), ‘Long-Term’ (10-500 years), and ‘Extended Term’ (up to 500 years). This framework is far more empowering for an artist.
Instead of asking the paralyzing question “Is my work archival?”, you can now ask a series of more practical questions: “What is the intended Material Lifespan of this piece?”, “Am I creating a ‘Medium-Term’ work for a specific exhibition, or am I aiming for ‘Long-Term’ collectability?”, “What specific materials and techniques will place my work within that desired category?” This shifts the conversation from a moralistic binary of good/bad materials to a strategic assessment of time. Museums stop disintegration not through magic, but through a combination of environmental control (stable temperature and humidity, low light, filtered air) and stabilizing interventions (like the consolidants we’ve discussed). They manage the conditions to meet a specific lifespan goal.
By learning this language, you can speak more effectively with galleries and collectors about the nature of your work, demonstrating a sophisticated understanding of its place in time.
Key Takeaways
- Mastering non-traditional materials is a balance between controlling stability and embracing decay as an artistic choice.
- Professional-grade adhesives and consolidants are essential tools for ensuring the structural integrity of mixed-media work.
- Studio safety, especially proper ventilation when heating plastics, is a non-negotiable part of a sustainable artistic practice.
- The term “archival” is obsolete; thinking in terms of specific material lifespans (“Medium-Term,” “Long-Term”) is the professional standard.
Toxic Cadmium vs. Plant Dyes: How to Make Your Studio Zero-Waste?
The drive to use found objects and industrial materials often stems from an ecological or anti-consumerist impulse. Yet, there’s a profound irony if an artist uses reclaimed materials but continues to use highly toxic traditional art supplies. The conversation around a “zero-waste” or sustainable studio practice must address the entire material ecosystem, from the substrate to the pigments. This involves a critical look at the very colors on your palette and the waste they produce, confronting the hazardous nature of many conventional art supplies.
Many of the most brilliant and historically significant pigments are, in fact, highly toxic. According to occupational health and safety regulations for artists, common paint pigments contain hazardous heavy metals including lead, chromium, and cadmium. These substances can cause severe long-term health damage and create toxic waste that is difficult to dispose of responsibly. The choice between the vibrant permanence of a cadmium red and the subtle, more fugitive color of a plant-based dye is a perfect example of the Archival Tension meeting ecological consciousness. It forces the artist to weigh aesthetics, longevity, personal health, and environmental impact.
Navigating this complex terrain is a hallmark of the contemporary artist. It requires research, experimentation, and sometimes, strategic compromise. The journey of one artist illustrates this professional navigation perfectly.
Collage Artist’s Transition to Archival Materials
Artist Laura Lynne documented her professional shift away from non-archival materials after witnessing rapid fading in her collages. Dark blue and purple construction papers were turning silver in a short time. To solve this, she implemented a two-track approach. For original works intended for collectors, she committed to fully archival materials: 100% cotton paper, acid-free tissues, and high-quality acrylics. However, to preserve her creative freedom to use fugitive materials, she developed a hybrid solution. For collages made with non-archival papers, she now creates high-quality archival prints using pigment inks on cotton paper. As she detailed in a post about her practice, this hybrid approach allows her to continue creative exploration while guaranteeing a permanent, sellable product for collectors, effectively solving the tension between creative freedom and market demands.
Making your studio more sustainable is not an all-or-nothing proposition. It is a series of informed choices that reflect your artistic values, from the materials you reclaim to the pigments you buy.
How to Manipulate Acrylics to Mimic Oil or Watercolor?
Even within the realm of “safe” and “stable” materials like acrylics, the innovative artist finds ways to push boundaries. Acrylic paint is the ultimate chameleon, but unlocking its full potential requires moving beyond using it straight from the tube. By mastering the use of various mediums and application techniques, you can make this versatile polymer paint mimic the rich, slow-drying glazes of oils, the transparent, flowing washes of watercolor, or the thick, sculptural presence of impasto. This is material alchemy in its purest form.
The secret lies in understanding that acrylic paint is not a single substance, but a system of polymers, pigments, and mediums. The mediums—gels, pastes, and liquid additives—are what allow you to fundamentally alter the paint’s behavior. A glazing liquid will extend the drying time and increase transparency, allowing for the deep, luminous layers characteristic of Old Master oil paintings. A heavy gel medium will give the paint body and hold brushstrokes, perfect for creating thick, textured impasto effects. Conversely, simply adding water can break down the polymer binder, resulting in a weak, chalky finish. For watercolor effects, a “flow” or “airbrush” medium is the correct choice, as it thins the paint without compromising its integrity.
Mastering these techniques means you are no longer limited by a material’s default properties. You can choose the exact viscosity, transparency, drying time, and finish for any given passage of your work. It’s a level of control that allows for immense creative freedom and sophisticated visual effects. The following checklist outlines fundamental techniques for expanding your acrylic vocabulary.
Your Action Plan: Acrylic Layering Techniques for Different Visual Effects
- Glazing: Mix colors with glazing medium for transparency. Apply in thin, even layers over dried areas to build depth and richness while letting underlying layers show through.
- Impasto: Apply thick layers of paint mixed with a gel medium using a brush or palette knife. This produces textured, three-dimensional effects that add physical depth.
- Dry Brushing: Use a nearly dry brush with a minimal amount of paint. Drag it lightly across the surface to emphasize texture and allow underlying colors to remain visible.
- Wet-on-Wet: Apply wet paint onto an already wet surface (or one coated with a slow-drying medium). This allows colors to blend seamlessly for soft transitions, but requires working quickly.
- Scumbling: Layer a semi-opaque color over a dried layer using a dry, stiff brush in a circular motion. This creates hazy, atmospheric effects and subtle color variations.
Ultimately, this deep material knowledge is the true foundation of an innovative practice. It’s not just about what you use, but how—and why—you use it.