Many artists believe achieving a “painterly” feel in digital art is about finding the right textured brushes or canvas overlays. The truth is more profound: the key isn’t to imitate the surface of traditional art, but to replicate its process. This means consciously reintroducing the decision-making friction and irreversible commitment that the “undo” button and infinite layers have eliminated, forcing you to think and act like a painter, not just a digital operator.
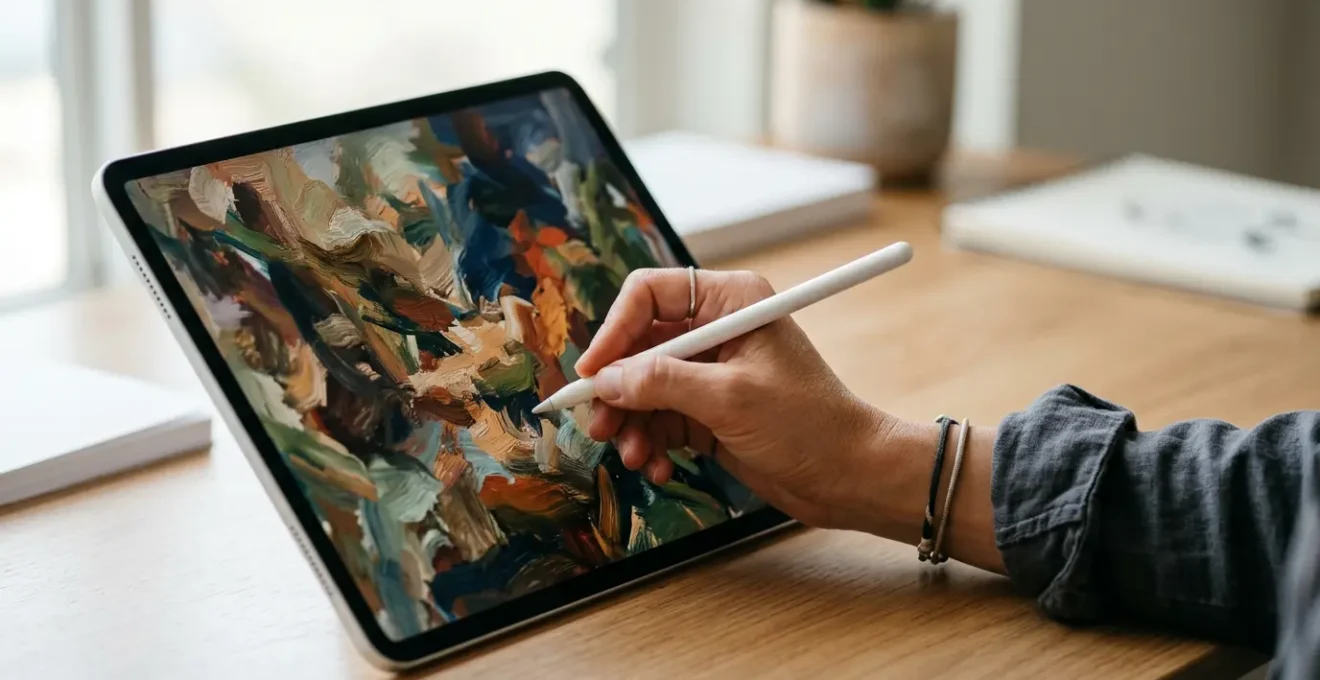
For many traditional artists, the transition to a digital canvas is a double-edged sword. The power is exhilarating—infinite colors, endless layers, and the god-like ability to undo any mistake with a simple tap. Yet, this very perfection often leads to a deep-seated frustration. The final work feels sterile, slick, and unmistakably “digital.” It lacks the soul, the happy accidents, and the tangible history of brushstrokes that define a physical painting. The pursuit of a “painterly” feel becomes a quest for the perfect brush pack or a hyper-realistic paper texture, treating the symptom rather than the cause.
The common advice to use textured brushes or work on a canvas layer is not wrong, but it’s incomplete. It focuses on simulating the final *look* of a painting rather than embracing its fundamental *process*. A painterly quality doesn’t just come from the texture of the canvas; it comes from the thousands of micro-decisions, the commitment to a brushstroke, and the necessity of painting over a mistake rather than simply erasing it from existence. This “digital forgiveness”—the safety net of Ctrl+Z—is what subtly weakens our artistic decision-making muscles.
But what if the solution wasn’t to add more digital tricks, but to take some away? What if the path to a more authentic, painterly feel lies not in better software, but in a more disciplined mindset? This guide explores how to fundamentally shift your approach, moving beyond surface imitation to cultivate a workflow rooted in the principles of traditional art. We will deconstruct the technical and philosophical barriers—from color management to the psychology of the “undo” button—to help you infuse your digital creations with the life and character you’ve been missing. The goal is to make the digital canvas a true extension of your artistic intent, not a barrier to it.
This article provides a comprehensive roadmap for traditional artists navigating the digital world. We will explore the nuances of software, color science, and, most importantly, the artistic mindset required to make your digital work feel truly alive. The following sections break down each critical component of this journey.
Summary: How to Create Digital Art That Retains a “Painterly” Feel?
- Procreate vs. Photoshop: Which Is Better for Fine Art Simulation?
- Why Do Your Colors Look Different on Phone Screens vs. Your Monitor?
- Giclée Printing: How to Translate RGB Pixels into CMYK Ink Correctly?
- The “Ctrl+Z” Addiction That Weakens Your Decision-Making Skills
- How to Future-Proof Your Digital Masterpieces Against File Corruption?
- Can Digital Replicas Satisfy the Need for Repatriation of Artifacts?
- Self-Portraiture vs. Selfies: What Has Changed in Self-Representation?
- How to Decode Visual Manipulation in Media Using Art History Skills?
Procreate vs. Photoshop: Which Is Better for Fine Art Simulation?
The first question for many artists is about the tools. Is the intuitive, touch-based interface of Procreate superior, or does the powerhouse desktop environment of Photoshop hold the key? The reality is that both are exceptionally capable, but they encourage different workflows. Procreate’s strength lies in its directness and simplicity, making it feel closer to sketching in a physical notebook. Its brush engine is fast and responsive, excellent for expressive linework and layering.
Photoshop, on the other hand, offers a deeper, more complex set of tools that can more closely simulate the physics of paint. Features like the Mixer Brush Tool are specifically designed to mimic wet-on-wet techniques, allowing you to blend colors on the canvas as if they were wet oil or acrylic. This tool can pick up color from the canvas and mix it with the color on your brush, creating a level of organic blending that is difficult to achieve otherwise. This allows for a more considered, layered approach reminiscent of traditional oil painting.
Ultimately, the choice of software is less important than your approach to it. A painterly feel is not a feature you can toggle on. It is an emergent quality born from your technique. You can create sterile, “plastic” art in Photoshop and you can create deeply textured, expressive work in Procreate. The secret is to master the specific tools within your chosen software that allow for “commitment marks”—visible, decisive strokes—and to resist the temptation to over-blend every edge into smooth, digital perfection.
Why Do Your Colors Look Different on Phone Screens vs. Your Monitor?
One of the most jarring experiences for a digital artist is spending hours perfecting a color palette, only to view the finished piece on a phone and see a completely different set of hues. This isn’t a flaw in your art; it’s a fundamental challenge of digital color science. Every screen is different, with variations in manufacturing, age, and settings. More importantly, different display technologies have different capabilities, or color gamuts—the specific range of colors a device can reproduce.
Your professional-grade monitor might be calibrated to display the wide Adobe RGB or DCI-P3 color spaces, which are rich in deep greens and cyans. However, most web content and older phone screens are designed around the smaller sRGB color space. When your wide-gamut image is viewed on an sRGB-limited screen without proper color management, the device simply cannot reproduce those out-of-range colors. It substitutes them for the nearest available color, often resulting in a dull, desaturated, or shifted appearance. Modern OLED phone screens complicate this further; they often have a much wider gamut than older LCD monitors, which can make colors appear oversaturated and unnaturally vibrant. As ViewSonic’s color management guide points out, modern OLED displays have a much larger color gamut than many older LCD monitors, creating a clear discrepancy.
To gain control, you must treat digital color like a physical medium with real-world constraints. This begins with monitor calibration. Using a hardware calibration device is non-negotiable for serious work. It creates a standardized, accurate view of your art. Secondly, work with an awareness of your final output. If your art is for the web, convert it to the sRGB profile and proof it on different devices, including your phone, during the creation process. This allows you to make informed compromises and ensure your artistic intent translates as accurately as possible across the digital ecosystem.
Your Action Plan: Essential Monitor Calibration Steps
- Device Check: Use hardware calibration tools like a Datacolor Spyder or X-Rite ColorChecker for professional accuracy.
- Environment Setup: Calibrate in controlled, moderate ambient light, avoiding direct glare on the screen.
- Target Setting: Calibrate to industry-standard targets: sRGB for web and Adobe RGB for high-quality print work.
- Profile Management: After calibration, ensure the generated ICC profile is active in your operating system’s color management settings.
- Regular Maintenance: Recalibrate your monitor every 1-3 months, as screen colors can drift over time.
Giclée Printing: How to Translate RGB Pixels into CMYK Ink Correctly?
The discrepancy between screen and reality becomes even more pronounced when moving from the luminous world of RGB (Red, Green, Blue) pixels to the subtractive world of CMYK (Cyan, Magenta, Yellow, Black) ink. The RGB color space used by screens is inherently larger than the standard CMYK gamut for printing. This means that vibrant electric blues, neon greens, and hot pinks that look stunning on your calibrated monitor simply do not exist in the world of four-color ink mixing. A naive conversion from RGB to CMYK often results in a “gamut clipping,” where these brilliant colors are flattened into a duller, muted version.
However, the term CMYK can be misleading in the context of high-end art reproduction. Professional Giclée printing is a far more sophisticated process than standard document printing. These specialized printers use extended ink sets to dramatically widen the printable color gamut, bridging the gap with RGB. As a leading service, The Art of Print, explains:
High quality Giclee printing uses many more ink colours (12 in our case as opposed to 4 in CMYK) and our machines are able to process much more colour information and reproduce the much wider colour Gamuts of RGB colour models.
– The Art Of Print, Giclée Printing Help, Advice & Best Practices
These 12-color machines often include light cyan, light magenta, multiple shades of black and gray, and even orange, green, or violet inks. This allows them to reproduce a much larger percentage of the Adobe RGB color space, preserving the subtlety and vibrancy of your original digital file.
For the artist, this means two things. First, always work and archive your art in a wide-gamut RGB space like Adobe RGB. Do not convert to CMYK yourself unless specifically required by a printer for a non-Giclée process. Second, communicate with your print shop. Provide them with your high-resolution RGB file (usually a 16-bit TIFF) and let their specialized RIP (Raster Image Processor) software handle the complex conversion to their 12-color ink set. They use custom profiles for their specific printer, ink, and paper combinations to ensure the most faithful translation possible.
The “Ctrl+Z” Addiction That Weakens Your Decision-Making Skills
The most profound difference between traditional and digital art is not texture or color, but consequence. When a traditional painter makes a mark, it is committed. It can be painted over, scraped off, or integrated into the piece, but it cannot be simply undone. This creates a state of high-stakes focus and forces decisive action. Every brushstroke carries weight. This is the source of the “happy accidents” and the visible history of creation that gives a physical painting its life.
Digital art, with its infinite “undo” capacity, removes this consequence. This “digital forgiveness” seems like a benefit, but it can become a crutch that weakens our artistic decision-making. We become hesitant, endlessly tweaking a single line, knowing we can always go back. We stop trusting our instincts and our hand-eye coordination. Instead of making a bold choice and moving on, we get trapped in a loop of minor adjustments, which often leads to a polished but lifeless result. The fear of imperfection is paradoxically amplified by the tool that promises perfection.
Breaking this addiction is central to achieving a painterly feel. It requires a conscious mindset shift, as artist Court Jones advises in a tutorial for Wacom:
When you make a mistake, try not to use the ‘Undo’ command. Just paint over it.
– Court Jones (Proko), How To Make Digital Paintings Look Traditional
To put this philosophy into practice, you can impose deliberate constraints on your workflow. Try completing a study on a single layer. Give yourself an “undo budget” of five undos per session. When you make a mark you dislike, resist the urge to erase it. Instead, treat it like wet paint: paint over it, blend it into the background, or turn it into something new. This forces you to problem-solve creatively and builds the confidence that is the hallmark of a mature artist. These “commitment marks”, born from decisive action, are what will truly make your digital work feel painted.
How to Future-Proof Your Digital Masterpieces Against File Corruption?
In the traditional art world, preservation is about controlling light, humidity, and temperature. In the digital realm, the enemy is more insidious: file corruption, software obsolescence, and data loss. A digital masterpiece, no matter how painterly, is fundamentally a fragile collection of bits. Without a deliberate archival strategy, your life’s work could vanish in an instant due to a hard drive failure or a file format that becomes unreadable in a decade.
Future-proofing your art requires a professional, systematic approach that goes beyond simply saving your file. The goal is to ensure that your artwork can be accessed, viewed, and printed exactly as you intended, years or even decades from now. This involves choosing the right file formats, meticulously documenting your process, and implementing a robust backup strategy. You must think like a museum conservator, but for your own digital creations.
The core of archival integrity is redundancy and documentation. You need multiple copies of your work on different types of media, with at least one copy stored in a different physical location. The industry standard is the 3-2-1 backup rule: at least three copies of your data, on two different media types (e.g., an external SSD and a cloud service), with one copy off-site. For the files themselves, saving a flattened version in an open, stable format like TIFF is crucial for long-term accessibility, while also preserving your original layered file (.PSD or .procreate) to retain the work’s “history.”
Checklist: The Digital Conservator’s Archiving Process
- Final Format: Save the final, flattened masterwork as an uncompressed, 16-bit TIFF file for maximum quality and long-term compatibility.
- Source Preservation: Separately save and archive the original layered source file (e.g., .PSD or .procreate) to maintain editability.
- Metadata Log: Create an accompanying text file (.txt) that documents the creation date, software and version used, specific brush packs, and the embedded color profile (e.g., Adobe RGB 1998).
- Naming Convention: Use a consistent, descriptive file naming system, such as `ProjectName_Version_Date_Resolution.tiff`, to avoid confusion.
- Backup Strategy: Implement the 3-2-1 backup rule: three total copies on two different types of storage media, with one copy stored off-site (e.g., cloud storage).
Can Digital Replicas Satisfy the Need for Repatriation of Artifacts?
As digital tools become more adept at creating “painterly” replicas with authentic feel and texture, the conversation extends beyond the artist’s studio. It enters the complex world of cultural heritage and museum ethics, specifically the heated debate over the repatriation of artifacts. Proponents of digital solutions argue that high-fidelity 3D scans and photorealistic digital models can provide unprecedented access to cultural treasures for people in their countries of origin, without physically moving the object.
A perfect digital replica can be studied from any angle, distributed globally, and experienced in virtual reality, offering an educational value that in some ways surpasses staring at an object behind glass. It democratizes access and preserves a perfect “snapshot” of the artifact at a moment in time, safe from physical degradation. In this view, the digital copy serves the core mission of a museum: education and preservation. It offers a seemingly elegant compromise to contentious ownership claims.
However, this argument often misses a crucial point, one that parallels the artist’s struggle for a “painterly” feel. A replica, no matter how perfect, lacks provenance and physicality. It does not carry the history of its creation, its use in rituals, its journey through time, or its spiritual significance to its community of origin. For many cultures, the object is not just a data set of shapes and colors; it is a living entity, an ancestor, or a vessel of communal power. Its physical presence in its homeland is non-negotiable. Therefore, while digital replicas are an invaluable tool for access and study, they cannot be a substitute for repatriation. They satisfy the need for academic knowledge but fail to address the deeper need for cultural and spiritual reconnection.
Self-Portraiture vs. Selfies: What Has Changed in Self-Representation?
The quest for a “painterly” feel in a digital self-portrait is also a quest for a different kind of self-representation than what dominates our current visual culture. The selfie, the dominant mode of self-representation today, is about immediacy, performance, and social validation. It is often a spontaneous, reactive image, curated with filters to project an idealized but ephemeral version of the self. Its value is measured in likes and shares, and its lifespan is fleeting.
A painted self-portrait, whether created with oil on canvas or pixels on a screen, operates on a completely different principle. It is an act of introspection and construction. It is a slow, deliberate process of observation and translation. The artist spends hours studying their own face, not for a flattering angle, but to understand the structure of the skull beneath the skin, the way light falls on a plane, and the subtle expression that betrays an inner state. Each brushstroke, each color choice, is a decision that builds toward a considered statement about identity.
This is where the “painterly” approach becomes so meaningful. Embracing “commitment marks” and painting over mistakes rather than erasing them mirrors the process of self-acceptance. The final portrait is not a perfect, airbrushed mask; it is a rich tapestry of decisions, revisions, and discoveries. It has a history. The final image is not a performance for an audience but a dialogue with the self. Therefore, the shift from a “plastic” digital look to a “painterly” one is also a shift from the logic of the selfie to the timeless tradition of the self-portrait—from fleeting performance to enduring introspection.
Key Takeaways
- The “painterly” feel is a result of process and mindset, not just textured brushes.
- Embrace constraints: limit layers and undo’s to build decisive, confident mark-making.
- Master color science: understand gamut differences between screen (RGB) and print (CMYK) and use calibration.
- Adopt a professional archival process (TIFF format, 3-2-1 backup rule) to protect your digital work.
How to Decode Visual Manipulation in Media Using Art History Skills?
Developing a painter’s eye—one trained to understand composition, color, light, and intent—is not just a skill for creating art. It is a powerful tool for critical thinking in a world saturated with manipulated images. The same art history skills used to analyze a Renaissance painting can be directly applied to deconstruct a news photograph, an advertisement, or a piece of online propaganda. By moving beyond the surface content of an image, you can decode its underlying message and methods of persuasion.
First, consider composition and framing. What has the creator chosen to include in the frame, and, more importantly, what have they left out? How are elements arranged to guide your eye toward a specific point? Is the subject shot from a low angle to appear powerful, or a high angle to appear vulnerable? These are the same compositional choices a painter like Jacques-Louis David used to glorify Napoleon.
Next, analyze light and color. Is the lighting harsh and dramatic, creating a sense of conflict, or soft and diffused, creating a feeling of peace? Are the colors warm and inviting, or cold and unsettling? Color grading in a digital photo or video is the modern equivalent of a painter’s palette, used to evoke a specific emotional response in the viewer, often subconsciously. Finally, look for symbolism and context. Just as a skull in a 17th-century Dutch still life (a “vanitas” painting) symbolizes mortality, modern images are filled with cultural symbols designed to trigger associations. Understanding the historical and cultural context of an image is crucial to uncovering its intended meaning, rather than just its literal content. This skill transforms you from a passive consumer of images into an active, critical interpreter.
By cultivating a painterly approach to digital art, you have not only enhanced your creative practice but also sharpened your ability to see the world with greater depth and clarity. The next logical step is to consciously apply this critical eye to the visual media you encounter every day.